Today was the 35th anniversary for the SCA Kingdom of Caid and the coronation of our newest King and Queen. As such, I decided to mark the occasion by wearing a new gown.
Readers may recall that I started a
new project back in December. That project was in anticipation of this coronation. But as the date drew nearer, I grew quite sick of hand-sewing eyelets on the kirtle. So, the Thursday before last, I decided to chuck the whole project (for now), and I started over (mostly).
The chemise was already completed, so I just needed to make a new kirtle, a new over-gown, and a new bonnet. I still wanted to base the new clothing on a couple of images I found in
The Queen's Servants by Caroline Johnson. (Johnson's book focuses on women's clothing from around 1500 to 1520, which is definitely not a "popular" period for costuming in Caid. At least, not at the time of publication.) Since I wanted to try something new and different, I sought out inspiration that was also different from I see frequently in Caid. The image on page 15 of Jone Wyddowsoun from 1513 featured both the pointed bonnet style and peaked gown neckline that I would ultimate emulate. The image from page 17 of
Emme Pownder also showed the same bonnet style, but I used it to inspire my not-quite-so-enormous sleeves.
 |
| Kirtle complete! |
For the kirtle, I used a beautiful russet wool that was gifted to me. I opted for the "V" neckline to emulate the kirtle in the images listed above. Plus, it seemed distinctly (early) English-Tudor as opposed to the very popular French-style gowns of the 1520s and onward.
As I am actively working towards a smaller figure, I chose to make the kirtle a bit too small. Being side-laced, this only meant that for now it had a gap between the lacing edges that would be unseen under the gown. This was a very quick part of the project in that I was able to draft, cut, and assemble the entire piece in one day.
 |
| Checking the combination |
While I do have a gorgeous golden silk for an over-gown, I opted to make a quick trip to our local fabric district to see if I could find an inexpensive fabric from which to make the over-gown. (When I make a new style of garment for the first time, I like to do so in a fabric that did not cost a fortune. There is nothing more depressing than "ruining" beloved fabric for a gown that just did not quite work out.)
 |
| Bodice completed |
My trip was a terrific success in that I found SEVERAL fabrics, all for less than $4.00/yard! To best coordinate with the russet, I chose to use a damask in dark brown/black with a brass/golden pattern. Had I been smart, I would've picked up a dark linen to use as lining. I did not, so I had to use linen from my stash, which was white.
 |
| Adding the pleats |
The bodice for the gown came together easily and quickly, to my surprise. As I seldom work with patterned fabric, I was worried about matching up and centering the design. Yet I managed to get it to match up in the front beautifully. The back, though, proved even better. I love how the pattern gives a slimming effect.
 |
| Side-view |
Once the bodice was assembled, it was a matter of attaching and pleating the skirt. I decided to put padded box pleats in the back as suggested by Johnson's book. It did mean more hand-sewing than I usually like when under a deadline, but as construction had been quick up to this point, I chose to take the time to produce a more accurate silhouette.
 |
| Gown completed! |
Once the padding was sewn in and the pleats attached to the bodice, it was just a matter of hemming the skirt and lining. I managed to finish the gown by Wednesday, giving myself two full days to put finish up the details.
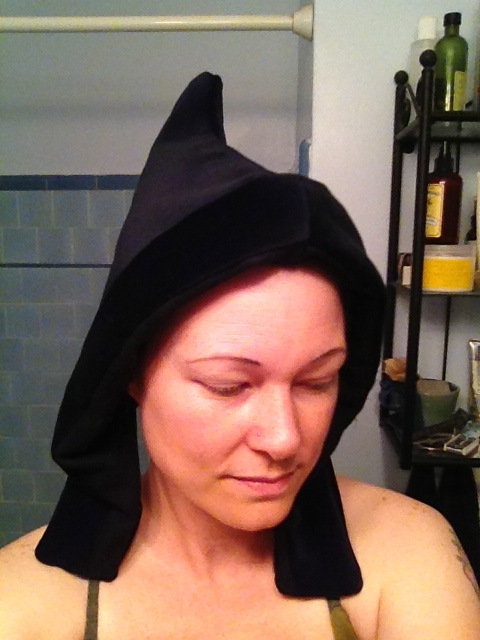
The bonnet was very easy to construct. A little facing, but otherwise only two pieces of outer fabric (black velvet) and two pieces of lining. Since I chose a bonnet with a uh... elfin profile, I did need to use about a yard of millinery wire to support the point. I was able to hand-sew that in with plenty of time to spare.
 |
| Kebler-elf bonnet |
I spent some time on Friday fidgeting with a few details. Because of my lack of black lining fabric, I made sure to secure the hooks and eyes in the front as much as possible to avoid the edge rolling too much. My efforts helped, but did not completely hide the white. Of course, this fact would generate the one critical comment about the ensemble that I received today.
Lessons learned from this project:
- A material inventory would have benefitted me greatly and saved me from using white lining fabric.
- While lining the skirt is beneficial in producing a beautiful inside to the gown, it is a pain to hem. Perhaps I should try my hand at bag-lining?
- I still loathe hand-finishing eyelets, though I found a few tricks to make it easier (buttonhole twist!).
- I also still hate piecing skirts. I think that next time I will use a shaped front panel, but then use large rectangular panels for the sides and back, pleating them to give the right drape.
- I rely a LOT of that ol' stand-by, the whipstitch. I should take the time to perfect catch-stitching between layers for a more "invisible" finish--even when most of my hand-sewing is inside the garment.